|
State of Wisconsin IM Training Handbook Release 10-02 March 16, 2010 |
View History
If you want to add links to the Captivate project, there are a few steps you need to tak e to make an active hyperlink. Only add links to static Captivate pages and not within demos.
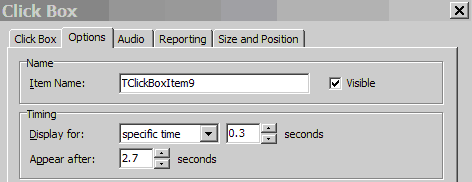
By default, each Captivate slide has a standard click box that allows the user to continue to the next slide by clicking anywhere in the slide. But they can’t do that until 2.7 seconds have passed. The cursor changes to a hand icon when 2.7 seconds have passed. To change this, double click on the slide (the clickbox area covers the whole slide by default) and the Click Box dialog box opens. Choose the Options tab and you can see the Timing> Appear after section shows 2.7 seconds.
If you have any hyperlinks in your project, including email links that open a mail client to send an email, you must create an additional click box that covers the text or object you want to be a hyperlink.
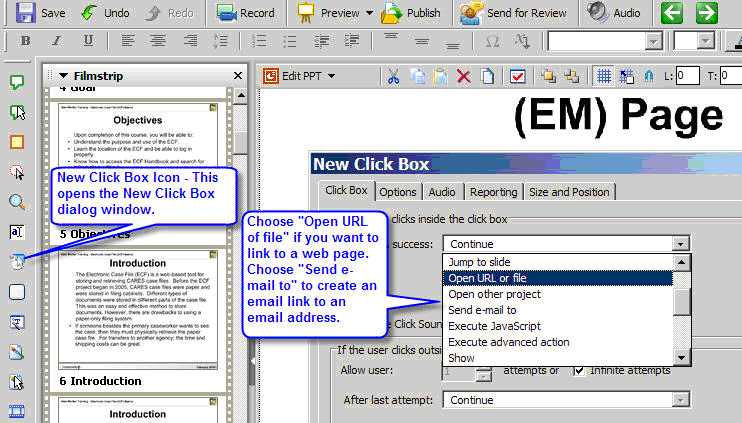
To do this, click on the New Click Box icon and choose either the “Open Url” or “Send Email to” options. Paste in the url or email address in the url field.


Then click on the down arrow next to the url field. Choose “New” so that the link opens in a new window. You don’t want to take the learner away from their training window. Finally, uncheck the box called “Continue playing project.” Otherwise, the project may continue playing while the learner is brought to the new window after clicking the link.
If you want to create the email link, simply enter the email address in the field instead of a url.
When you click OK, you’ll need to stretch the click box corners to cover the text you want to be the link.
In your timeline, make sure this hyperlink clickbox is on the top row. The rows of a timeline correspond to the layers in your project. The top row is the top layer. For this link to work correctly, the new clickbox must be the top layer and not be covered by another layer.
This page last updated in Release Number: 10-01
Release Date: 05/01/10
Effective Date: 05/01/10