9.2.2.2 History List Subscription
History list subscription saves a copy of the filtered report to the user’s Reporting History List. The user can run the filtered report directly from the history list. A History List Subscription can be configured to send users an email every time the report is run. The email contains a link to the report.
To Create a History List Subscription:
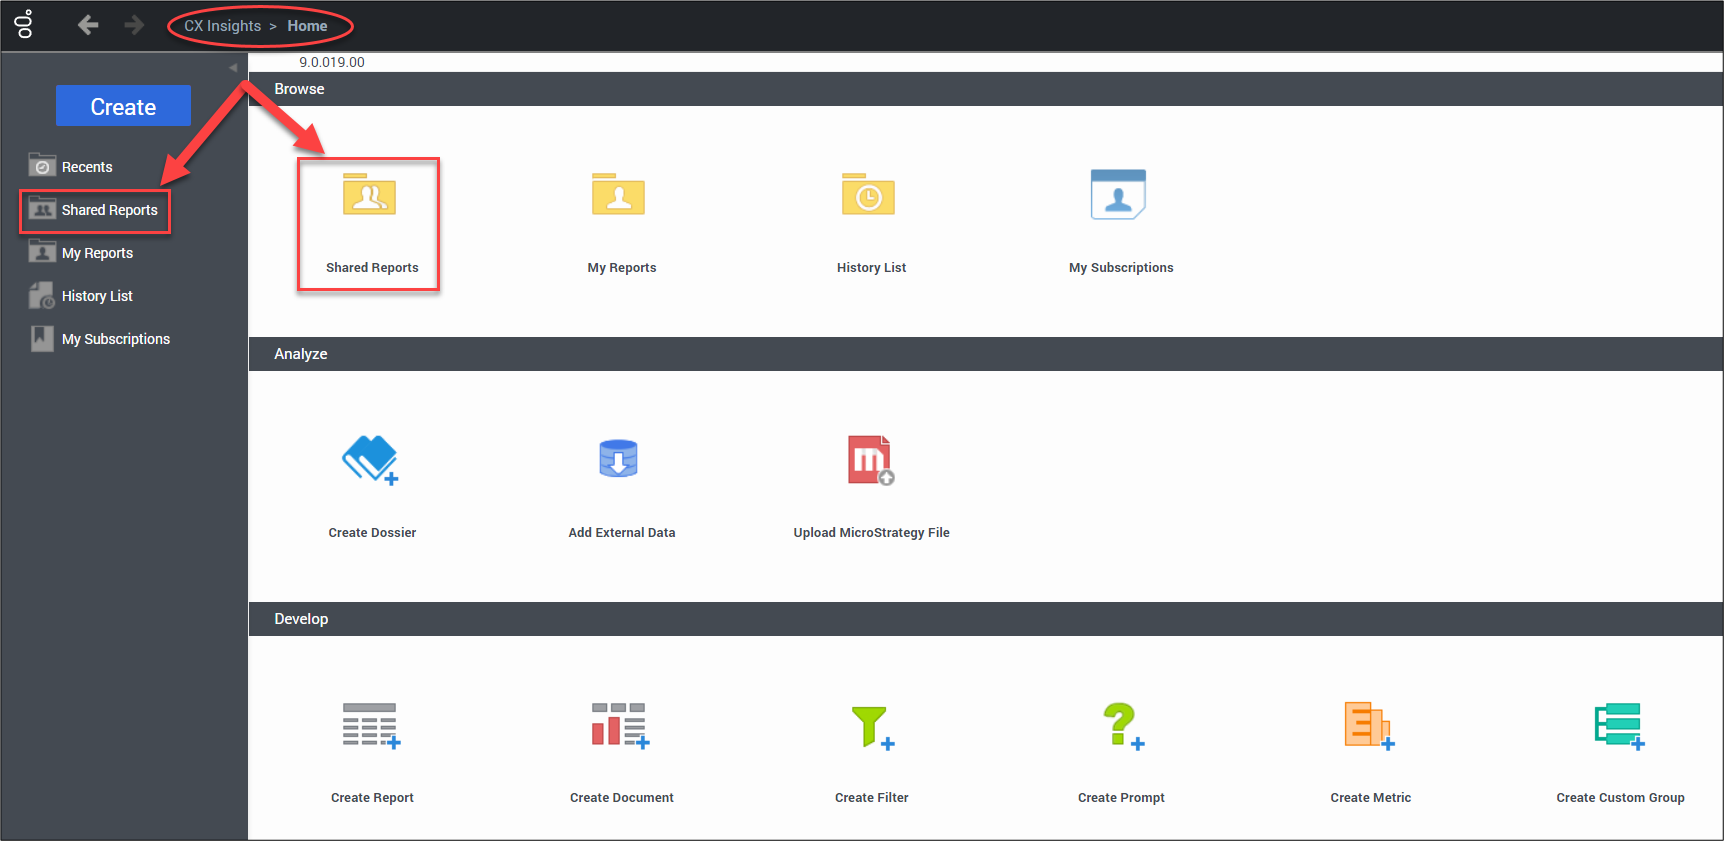
- Go to CX Insights > Home page, select Shared Reports from the left menu or Browse section.
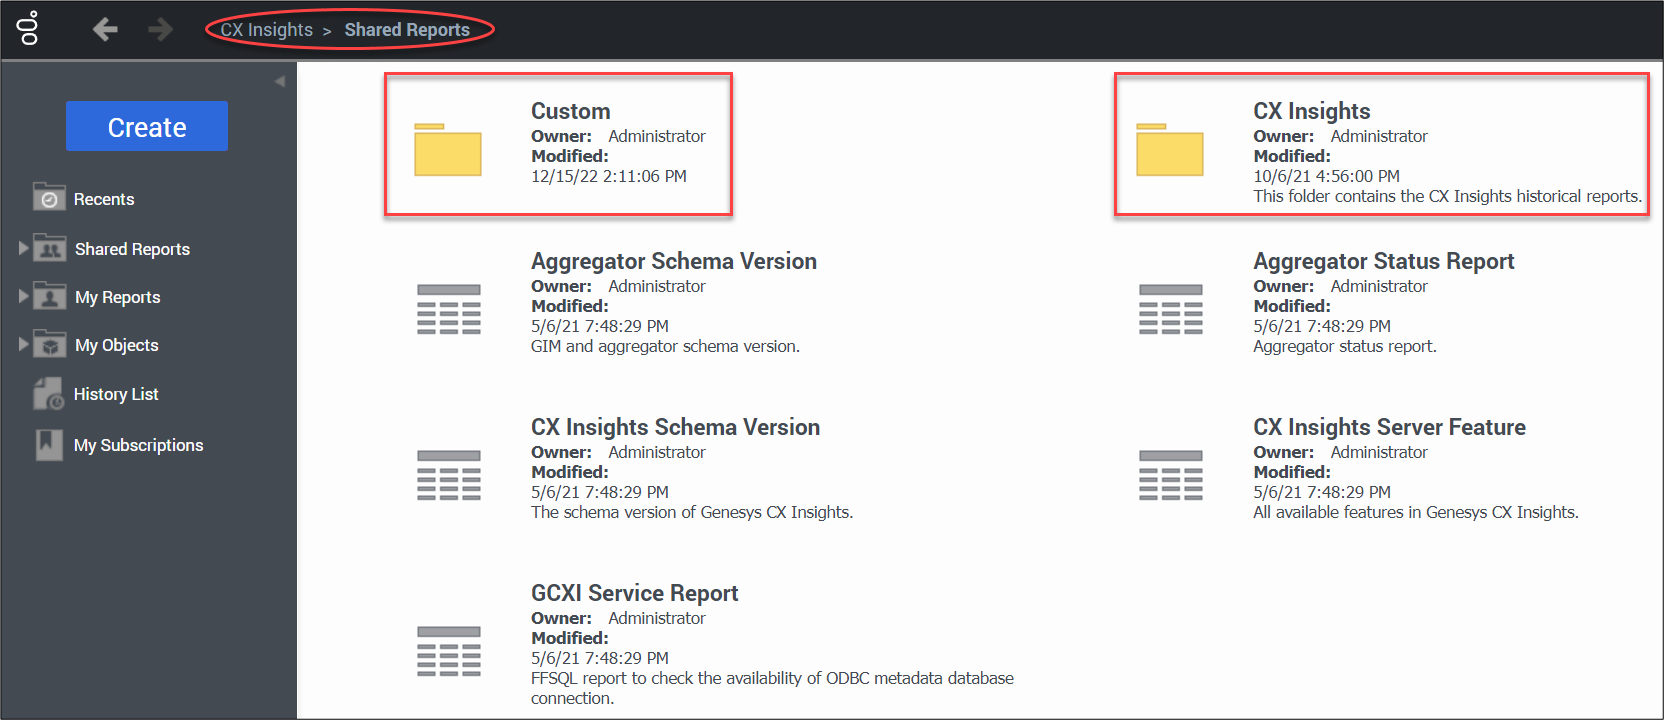
- Select the Custom or CX Insights folder.
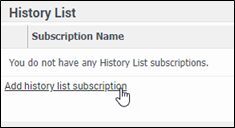
- Hover over the report of choice and select Subscriptions.

- Select Add history list subscription.
- User makes desired selections to the History List Subscription and Advanced Options.
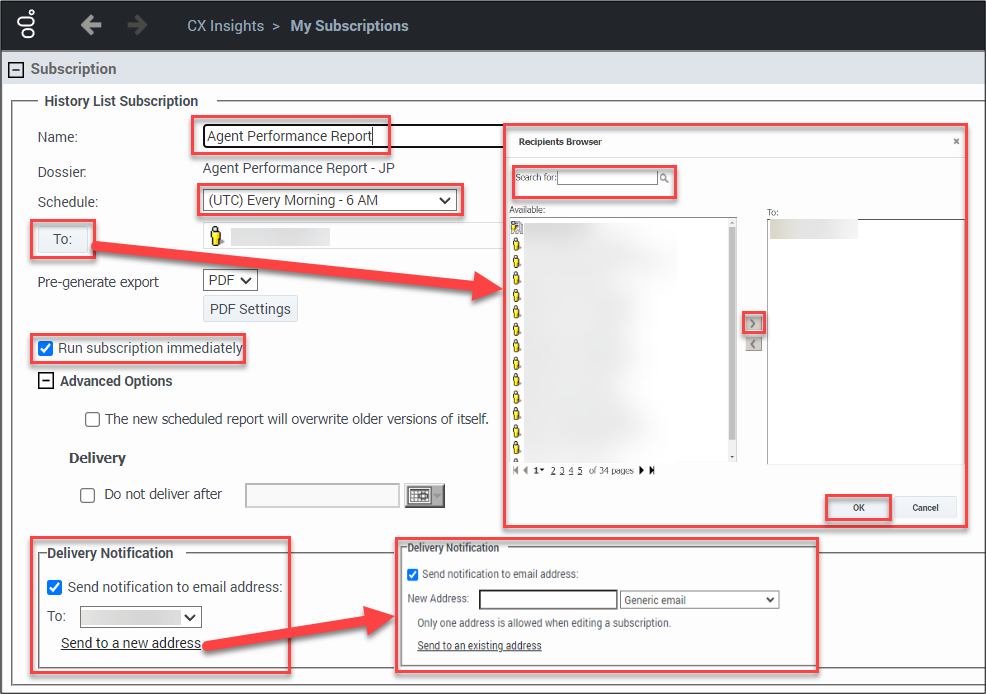
When making selections on this page pay attention to the following fields:- Name: enter a name for the subscription. This is the name of the subscription for the user’s reference and appears in “My Subscriptions” list. By default, the name of the generated report is displayed.
- Schedule: from the drop down select a frequency of the report. Notice the time zone used to generate the subscription is based on Coordinated Universal Time (UTC). If “(UTC) Every Morning – 6AM” is selected the report is ready at midnight Central Standard Time (CST). Do not generate reports hourly.
- To: select this button to add recipients to the subscription.
- Run subscription immediately: select this and the system delivers a test report immediately.
- Delivery Notification: to have a notification email sent when the report or document is delivered, select the “Send notification to email address” checkbox, then do one of the following:
- To send the notification to an email address that has already been defined, select an address from the “To” drop down list.
- To send the notification to a new email address, in the New Address field, type the email address of the user to send a delivery notification to and select the email client type of the specified email address from the drop-down list.
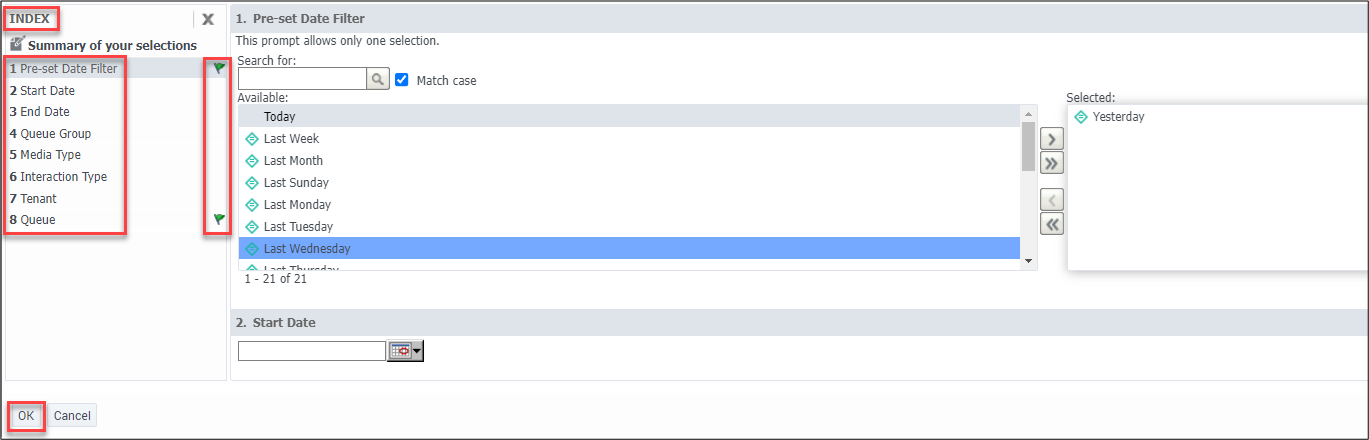
- Select filters in the INDEX section. There are eight prompt selections to choose filters for: Pre-set Date Filter, Start Date, End Date, Queue Group, Media Type, Interaction Type, Tenant, and Queue. Filters may vary based on the chosen report.
Displayed green flag means, there are filters chosen for that prompt.
Search feature is case sensitive. Uncheck “Match case” when using the search feature.
Select OK.
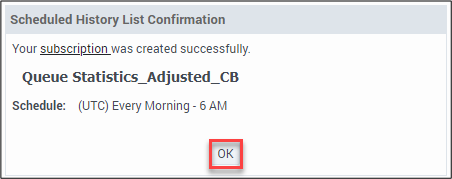
- Once the subscription is created the user receives the following pop-up window. Select OK.
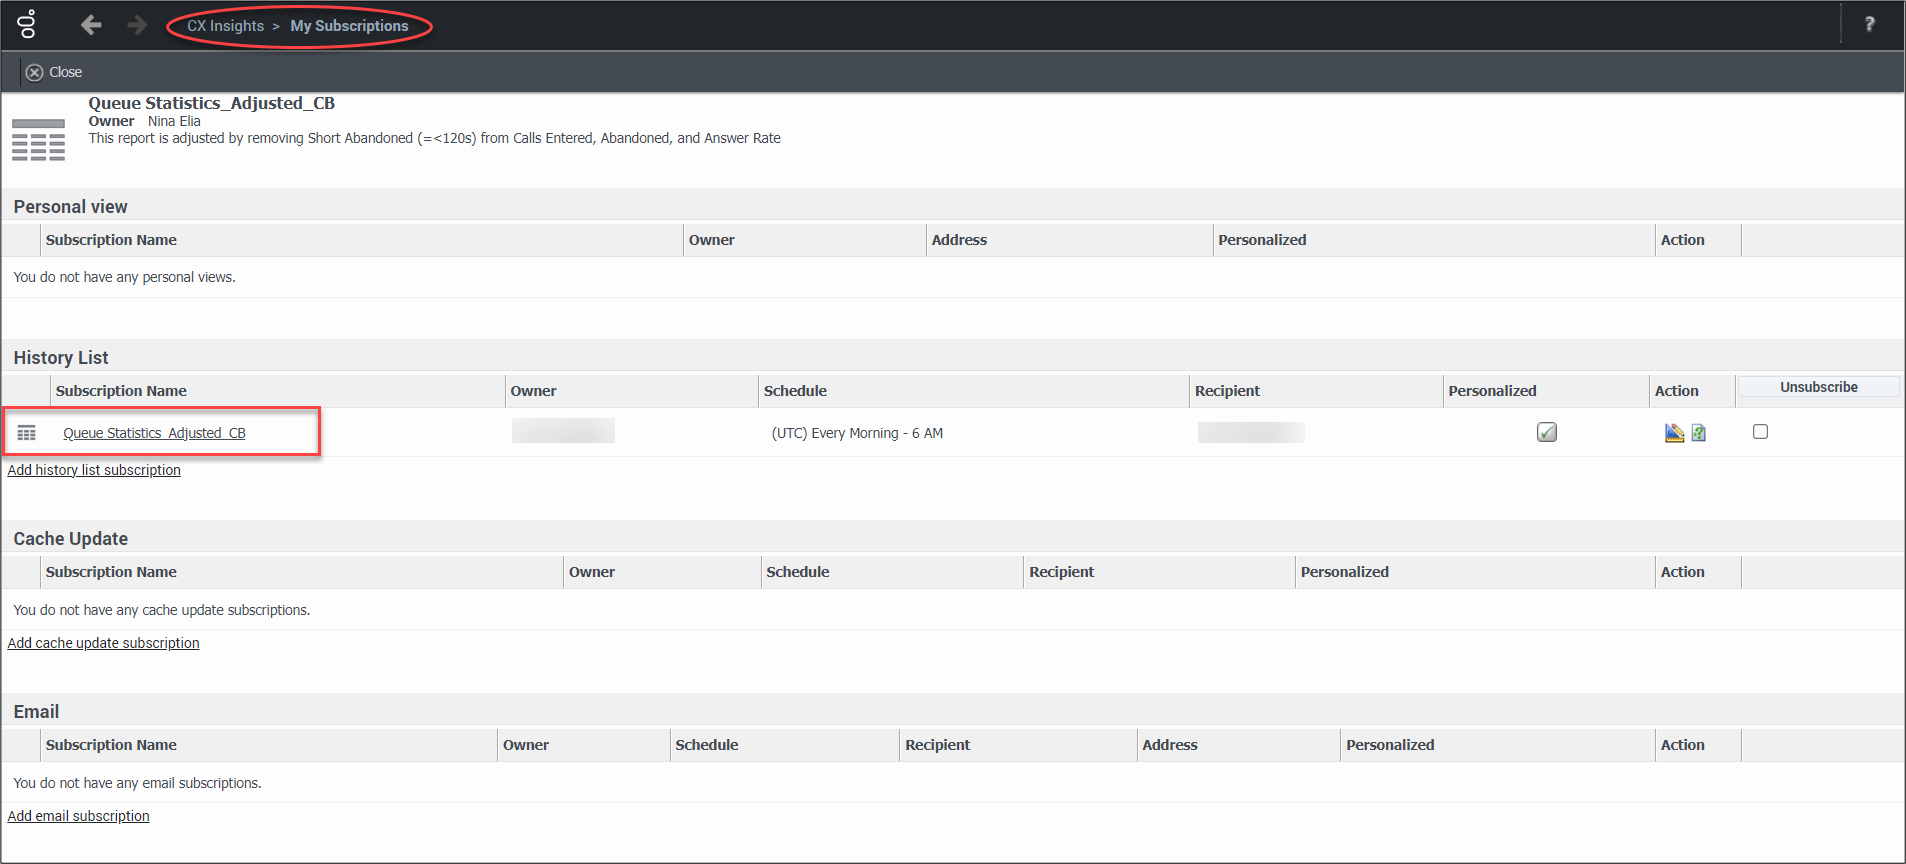
- The CX Insights > My Subscriptions page is displayed. The subscription appears and the user can select the link to open the report.
- From the REPORT HOME tab there are additional features:
Add to History List, Create Personal View, Share, Print, Send Now, Schedule Delivery to History List, Export or PDF.
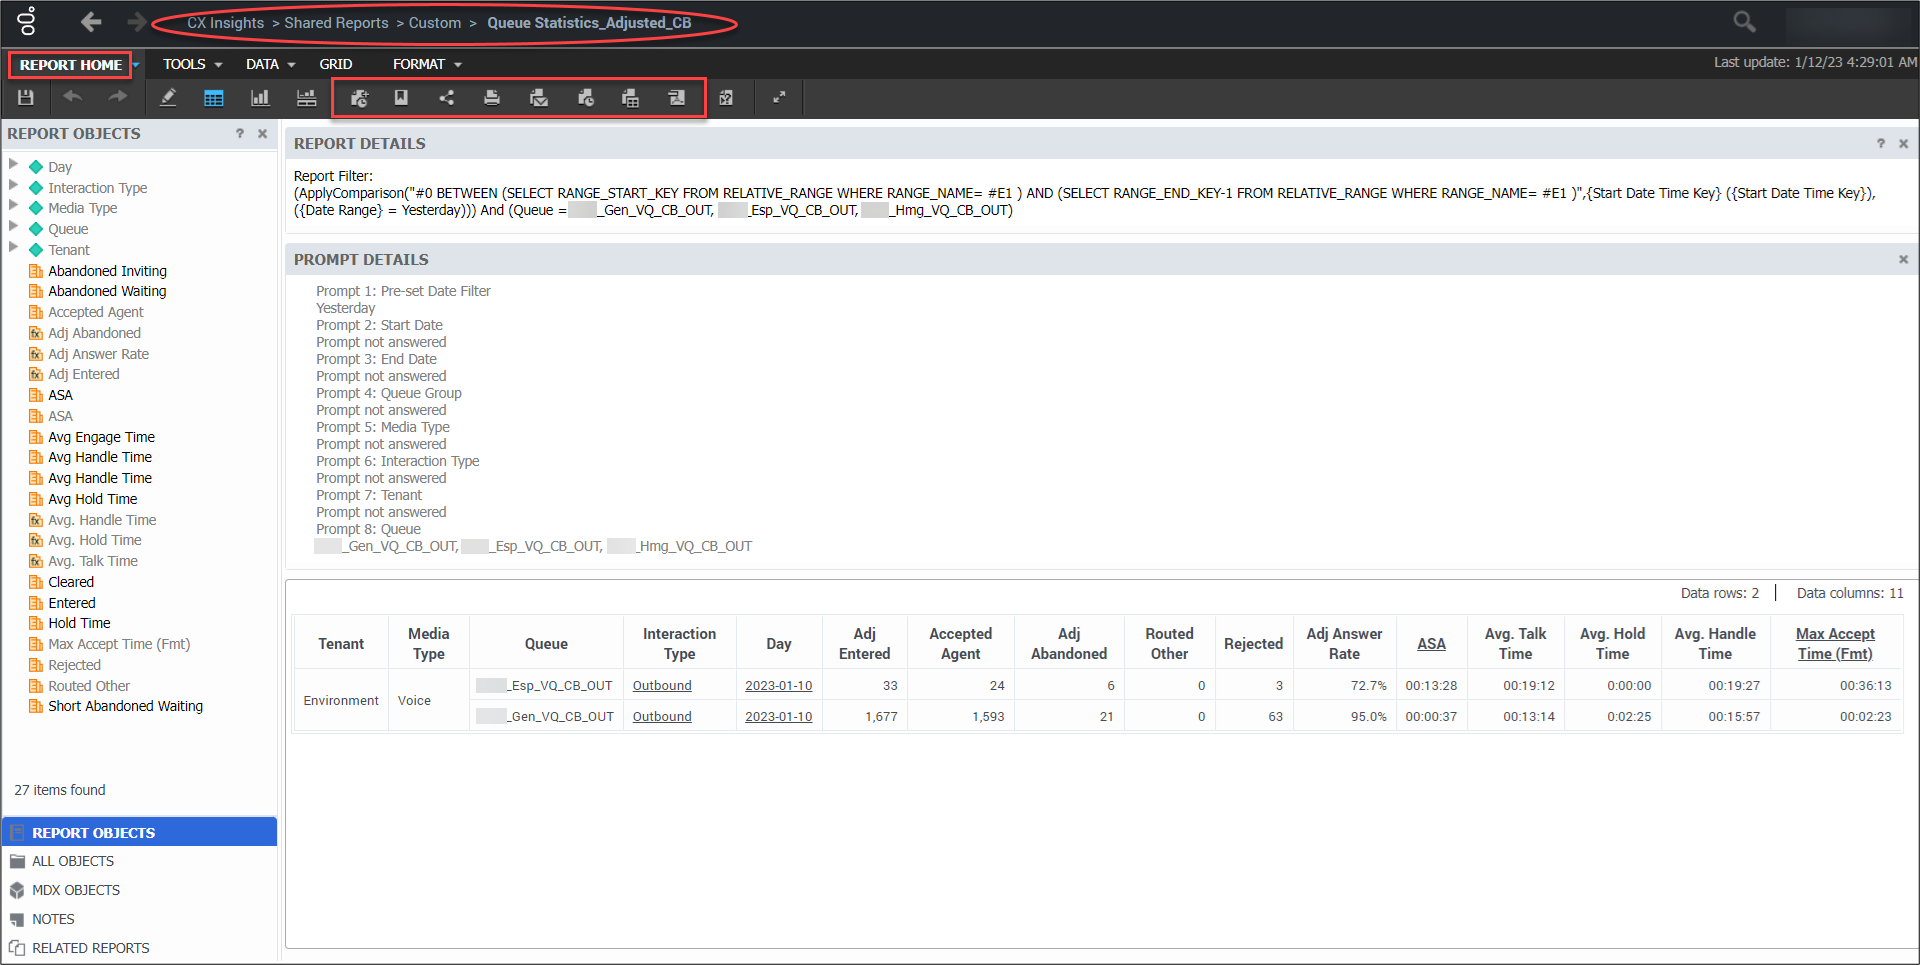
The Queue Statistics_Adjusted_CB report works best if exported as an excel document.
This page last updated in Release Number: 23-01
Release Date: 2/25/2023
Effective Date: 2/25/2023