Department of Health Services

Electronic Case File User Guide

Page Last Updated: October 27, 2018

ECF Capture

Import a Document

ECF Capture allows you to import bmp, gif, jpeg, pdf, png, or tiff files from your computer to upload to ECF Capture.


Work on this page is not saved until you click Create Job
Scanned or imported documents are not added to the work queue click Create Job or use the shortcut CTRL + SHIFT + C. If documents are listed on the left-hand side of the screen, the job has not been created.   Do not leave the page if any documents are listed or all work will be lost.

Instructions

Jump to Step      (Click for List)(Click for List)


Open the Scan Page

From the Work Queue page, click Electronic Case Files > Scan

Click image for larger view

Change the Scanner to File Import

Click View or Change Scan Settings to open the Scan Settings pop-up.

Click image for larger view

Select File Import from the Select a Scanner drop-down list.
Do not adjust any image settings
All scanned and imported images must be in black and white at 300 dpi.


Click image for larger view

Click OK to save settings.

Import the File from Your Computer

Click Scan All Sheets .

Click image for larger view

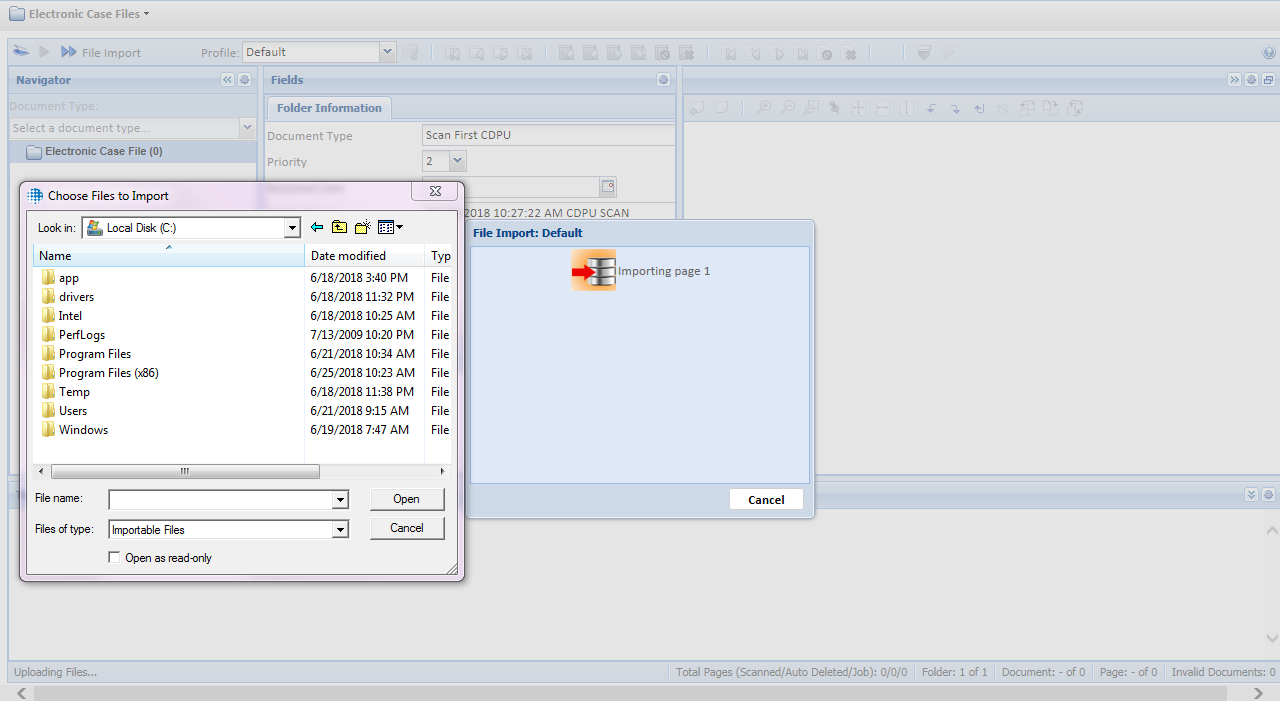
Select the file(s) to import. This can be done multiple times until all documents are added to the folder.   The imported file(s) will appear in the Electronic Case File Folder

Click image for larger view

Enter Folder Information

Set the document properties for the imported file(s). Treat the file(s) the same as scanned documents when selecting the Document Type.
Folder Information Use

Document Type

The Document Type determines how the scanned folder is routed through the work queue.


The Document Types are:


Document Type Default Priority

Description

Scan First CDPU 2 Scanned locally and indexed at the CDPU using the Scan First workflow.
Scan First Local 2 Scanned and indexed locally using the Scan First workflow.
Scan First Returned Mail 7 Same as Scan First CDPU, but marks the document as a lower priority for indexing.
Process First CDPU 3 Scanned locally and indexed at the CDPU using the Process First Workflow.
Process First CDPU Priority 6 6 Same use as Process First CDPU, but marks the document as lower priority for indexing. This is used only for indexing backlogged documents.
Process First Local 5 Scanned and indexed locally using the Process First Workflow.
Process First OIG 6 Used by the CDPU for Office of Inspector General documents.
Fax CDPU 2 Assigned to all incoming faxes received by the CDPU
Fax MDPU 2 Assigned to all incoming faxes received by the MDPU
Priority Priority is numbered from 1 - 10 with 1 being the highest priority and 10 being the lowest. Priorities are tied to Document Types and can only be adjusted by CDPU and MDPU managers.   Documents are sorted in the Work Queue by Priority and then Capture Date.
Received Date The date the document being scanned was received.   The Received Date can be up to 180 days in the past.
Folder Name A unique folder name is assigned to each group of documents that are scanned together. It is automatically generated by ECF Capture when the Scan page is opened.   The folder name includes the date and time the documents were scanned and the location where the scan took place.

Click image for larger view

Verify Documents Scanned and Separated Correctly

Documents can be split, merged or deleted on this screen. Pages can be rotated or deleted. Any issues that cannot be resolved with one of those actions must be rescanned.  
  1. Split pages into their own documents
    1. Select the first page of the new document in the Thumbnails view.
    2. Right-click on the page thumbnail and select Split Document.
    3. A new document will be created beginning with the selected page.

Click image for larger view

  1. Merge document with the previous document in the list
    1. Select the bottom document(s) to merge in the Electronic Case Files folder.
    2. Right-click on the document(s) and select Merge with Previous.


Click image for larger view

  1. Merge selected documents
    1. Select the documents to merge in the Electronic Case Files folder.
    2. Right-click on one of the documents and select Merge Selected.

Click image for larger view

  1. Rotate page
    1. Select the page in the Thumbnails view.
    2. Either:
      1. Right-click the page thumbnail and select one of the rotate options.
      2. Click one of the rotate document buttons: , , or

Click image for larger view

  1. Delete a page
    1. Select the page to delete in the Thumbnail view.
    2. Either:
      1. Right-click on the page thumbnail and select Delete.
      2. Click Delete Page
    3. Select Yes in the pop-up window to confirm the deletion. This cannot be undone.

Click image for larger view

  1. Delete a document (This will delete all pages within the document.)
    1. Select the document to delete in the Electronic Case Files folder.
    2. Either:
      1. Right-click on the document name and select Delete.
      2. Click Delete Document .
    3. Select Yes in the pop-up window to confirm the deletion. This cannot be undone.

Click image for larger view

Create Job

Click Create Job .
Work on this page is not saved until you click Create Job
Scanned or imported documents are not added to the work queue click Create Job or use the shortcut CTRL + SHIFT + C. If documents are listed on the left-hand side of the screen, the job has not been created.   Do not leave the page if any documents are listed or all work will be lost.

Click image for larger view

Change Settings Back to Scan

Click View or Change Scan Settings  to open the Scan Settings pop-up.

Click image for larger view

Select the scanner name from the Select a Scanner drop-down list.
Do not adjust any image settings
All scanned and imported images must be in black and white at 300 dpi.


Click image for larger view

Click OK to save settings.


Stay in the Know Click here to be notified when this handbook is updated.

P-16102

Release 25-01
February 22, 2025

Need Help? Contact the Wisconsin Help Desk at 608-261-4400 (Madison) | 1-866-335-2180 (Toll-Free) | helpdesk@wi.gov (email) and request assistance with CARES ECF
The content within this handbook is the sole responsibility of the State of Wisconsin's Department of Health Services (DHS). This site will link to sites outside of DHS where appropriate. DHS is in no way responsible for the content of sites outside of DHS.